In this WordPress performance optimization guide, we will set up WordPress with recommended settings for the best results. These settings will help reduce website load time and minimize spam comments. If you’re new to WordPress and its uses, read our article, Introduction to WordPress.
General Settings
To configure WordPress settings, navigate to the WordPress Dashboard, where you can find the Settings tab. To access and configure the general settings, click on General within the Settings tab.
From the general settings page, you can modify the following:
- Website Title
- WordPress Address (the URL for accessing the WordPress backend)
- Site Address (the base URL for the website’s frontend)
- Administration Email Address (mail ID of website owner)
- Site Language
- Date and Time Format
In most cases, these settings do not require modification.
General settings include useful options such as changing the website’s tagline, site icon (available in recent WordPress versions), timezone, and enabling membership. The screenshot below shows a typical configuration for a blogging website.

For most blogging websites, enabling membership is not necessary. However, if you decide to allow membership, it is a good practice to set the New User Default Role to Subscriber. If you accept guest posts, assign the Contributor role to those users. Only trusted individuals should have roles other than Subscriber and Contributor.
If you are publishing content for Indian users, set the Timezone to UTC+5:30, which corresponds to Indian Standard Time (IST). This time zone is 5 hours and 30 minutes ahead of Coordinated Universal Time (UTC). Adjust the timezone according to the country or city for which you are publishing content.
Writing Settings
The next option is Writing Settings. Here, you can configure the Default Post Category, Default Post Format, and Post via Email settings. Generally, there is no need to modify these options.
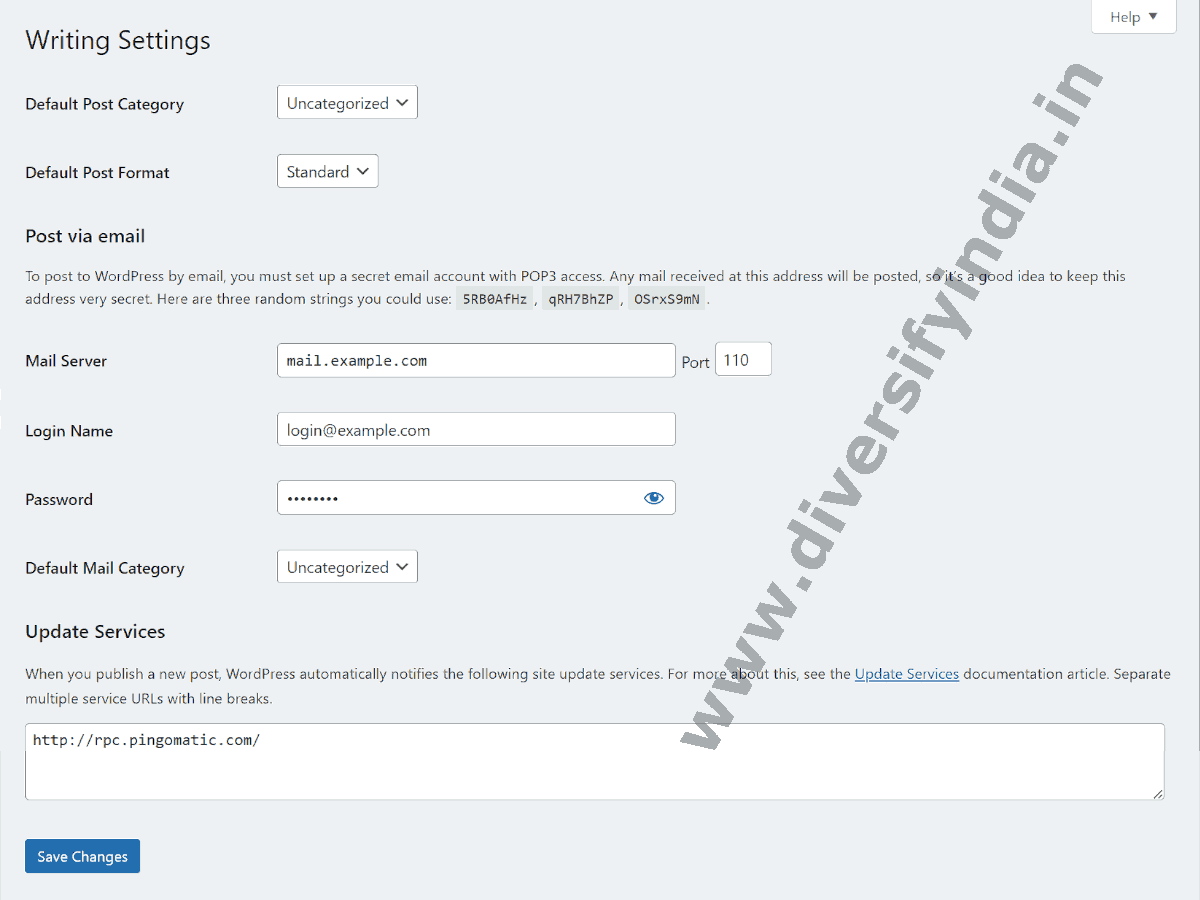
- Default Post Category: This is the category applied to posts by default. It can be left as Uncategorized.
- Default Post Format: This setting allows themes to apply a specific post format or create different styles for various types of posts.
- Post via Email: This option enables posting to your blog through an email address. Note that the built-in Post via Email functionality is deprecated and will be removed in a future release.
- Update Services: These are tools that notify other platforms when you update your blog. WordPress automatically sends an XML-RPC ping to popular services whenever you create or update a post. To avoid being marked as spam, it is recommended to use only one ping service.
Plugins for the Post via Email Feature
While most bloggers do not utilize the Post via Email feature, you can enable this functionality using one of the following plugins:
Popular Update Services
Ping-O-Matic is the default service used by WordPress to notify search engines about blog updates. Below are URLs of XML-RPC ping services supported by WordPress:
Reading Settings
In Reading Settings, you can configure templates for the homepage, the number of posts to display on the blog page, and the number of posts in feeds. Below are the recommended reading settings for a blogging website:
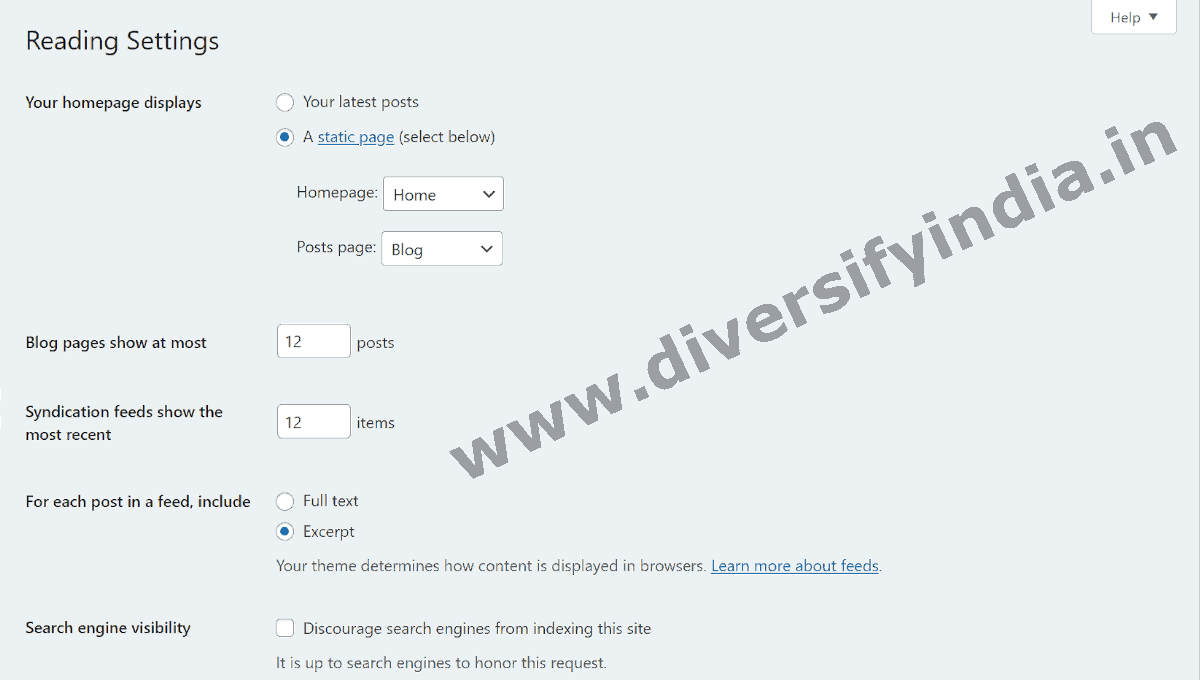
- Your homepage displays: Choose a Static Page for both the Homepage and Posts Page.
- Blog pages show at most: 12 posts.
- Syndication feeds show the most recent: 12 items.
- For each post in a feed, include: Excerpt.
- Search engine visibility: Ensure this checkbox is unchecked. If checked, search engines will not crawl your website.
Discussion Settings
In Discussion Settings, you can configure comment-related options for your website, such as the number of links allowed in comments and enabling or disabling Gravatar services. Below are the recommended settings for a typical blogging website:
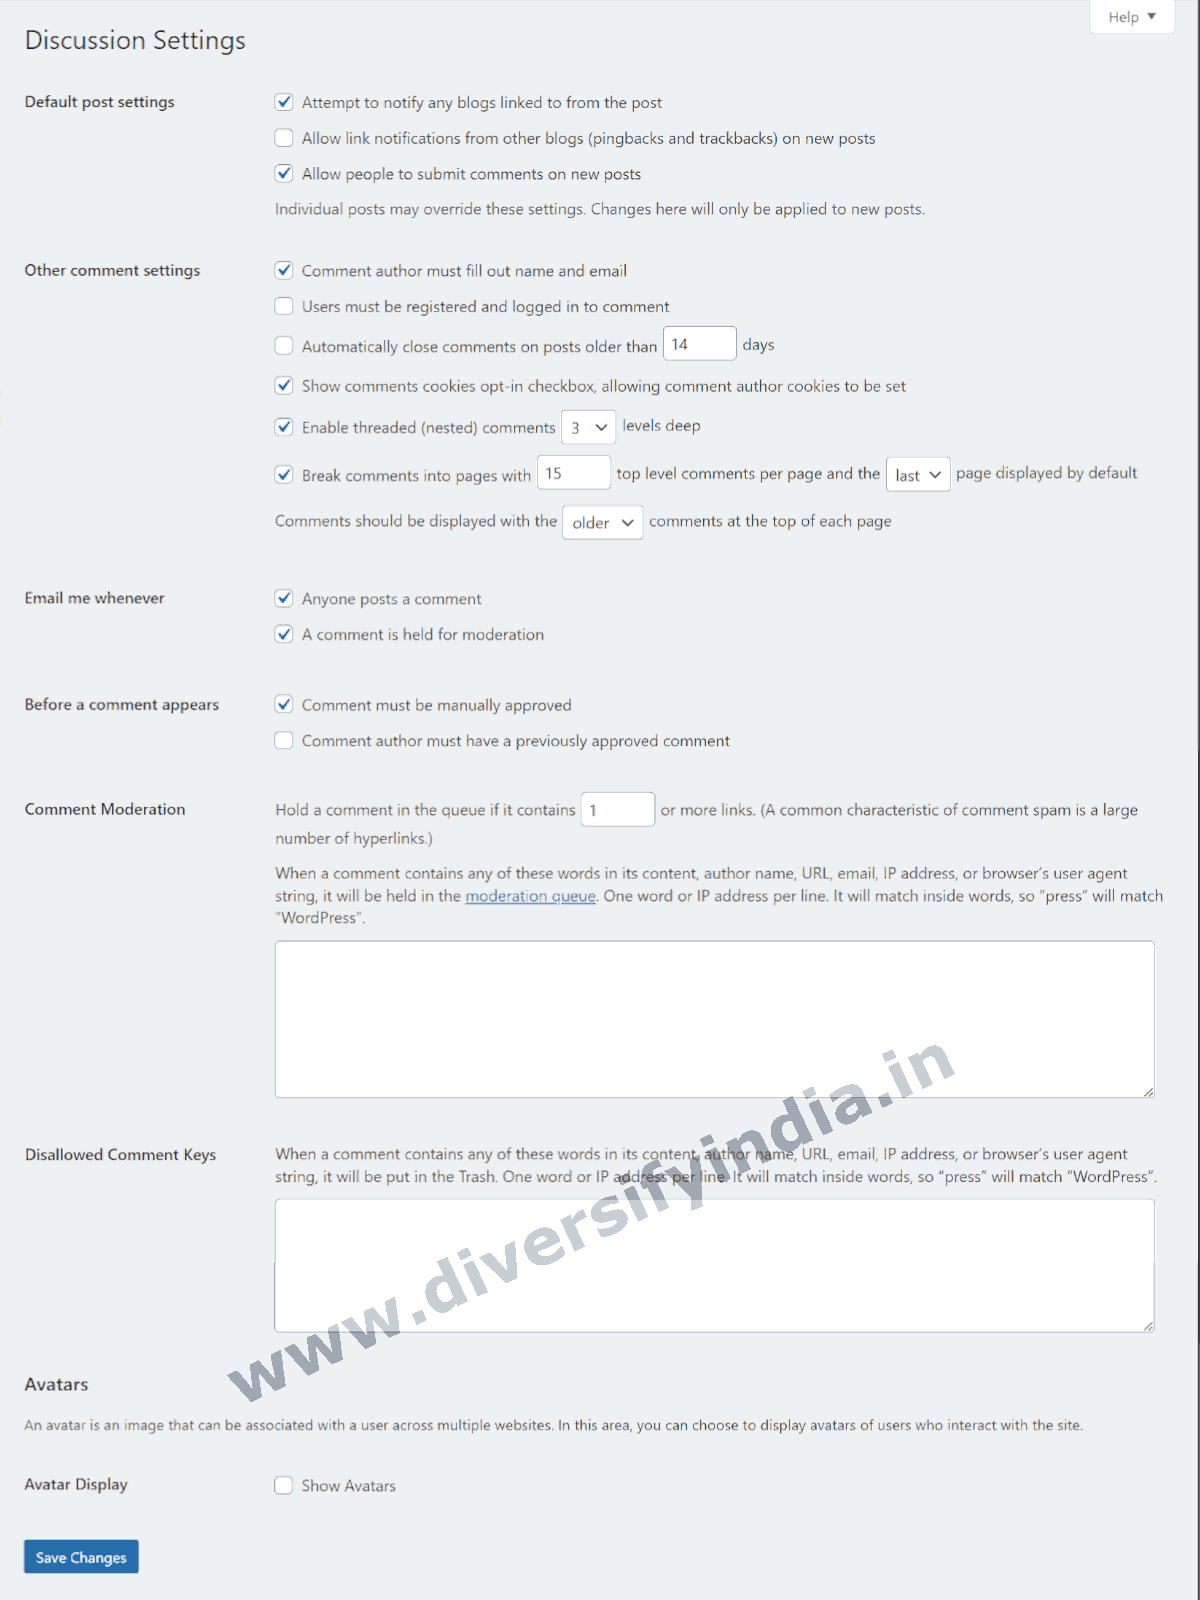
- Attempt to notify any blogs linked to from the post: ON. This sends pings and trackbacks to linked blogs when you publish articles.
- Allow link notifications from other blogs (pingbacks and trackbacks) on new posts: OFF. Disabling this can help reduce spam comments.
- Allow people to submit comments on new posts: ON.
- Comment author must fill out name and email: ON.
- Users must be registered and logged in to comment: OFF. Keep this unchecked, especially if membership is not allowed on your website.
- Automatically close comments on posts older than X days: OFF. This option lets you accept comments only for a specific time period.
- Show comments cookies opt-in checkbox: ON.
- Enable threaded (nested) comments: Set to 3 levels deep. Higher levels may affect readability and site responsiveness on mobile devices.
- Break comments into pages: ON, with 15 top-level comments per page, displaying the last page by default. Show older comments at the top of each page.
- Email me whenever:
- Anyone posts a comment: ON.
- A comment is held for moderation: ON.
- Before a comment appears:
- Comment must be manually approved: ON. This helps prevent spam.
- Comment author must have a previously approved comment: OFF.
- Comment Moderation: Hold a comment in the queue if it contains 1 or more links to minimize spam.
- Comment Moderation Keywords: Enter words that you want to flag for review. This box can be left empty if the “Comment must be manually approved” setting is enabled.
- Disallowed Comment Keys: Enter spam, vulgar, or offensive words to automatically move comments containing these words to the Trash.
- Avatar Display: OFF. This setting enables or disables the Gravatar service on your website.
Media Settings
WordPress has a built-in feature that generates additional image sizes when you upload images. By default, it creates images in the following sizes:
- Thumbnail size: 150×150 px
- Medium size: 300×300 px
- Large size: 1024×1024 px
These generated images can be adjusted to meet your resolution requirements. You can prevent WordPress from generating extra image sizes by setting the width and height values to 0. This can help save storage space but keep in mind that this feature is essential for maintaining a responsive website and reducing bandwidth by serving smaller images to users on small-screen devices.
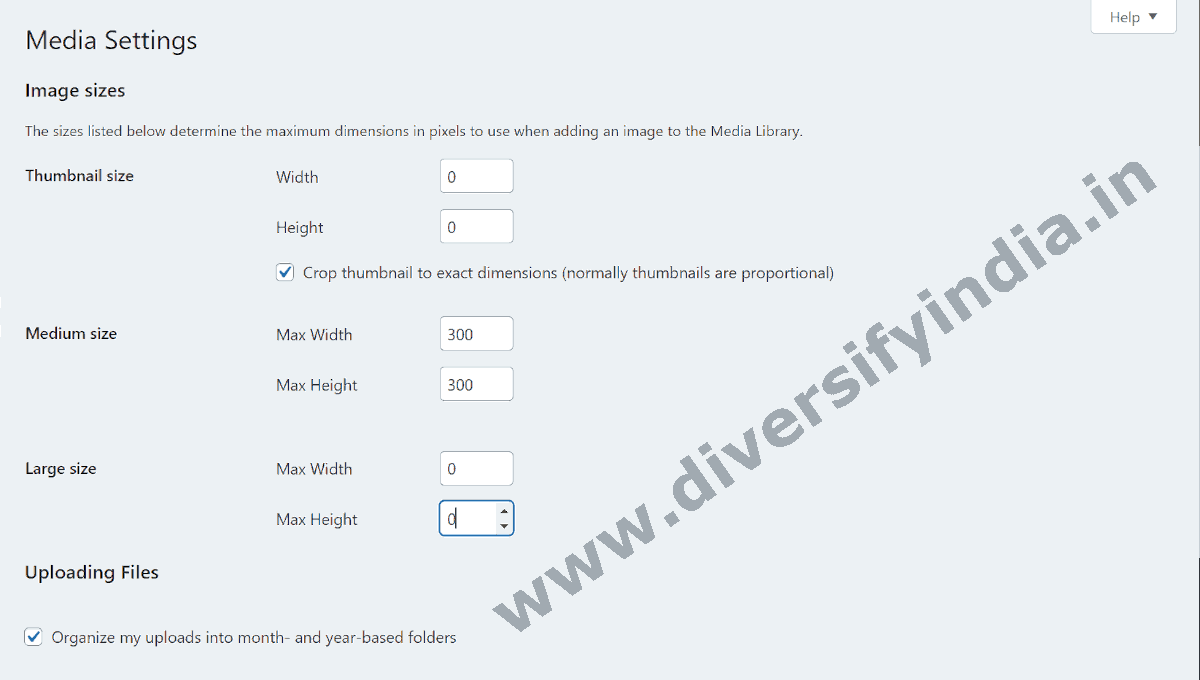
Recommended Setting
- Disable thumbnail and large size images by setting their width and height to 0, and retain only the medium size images for small-screen devices. This approach maintains a balance between storage usage and website responsiveness.
- Organize my uploads into month- and year-based folders: Turn ON. This helps keep your media library organized and easy to manage.
Permalink Settings
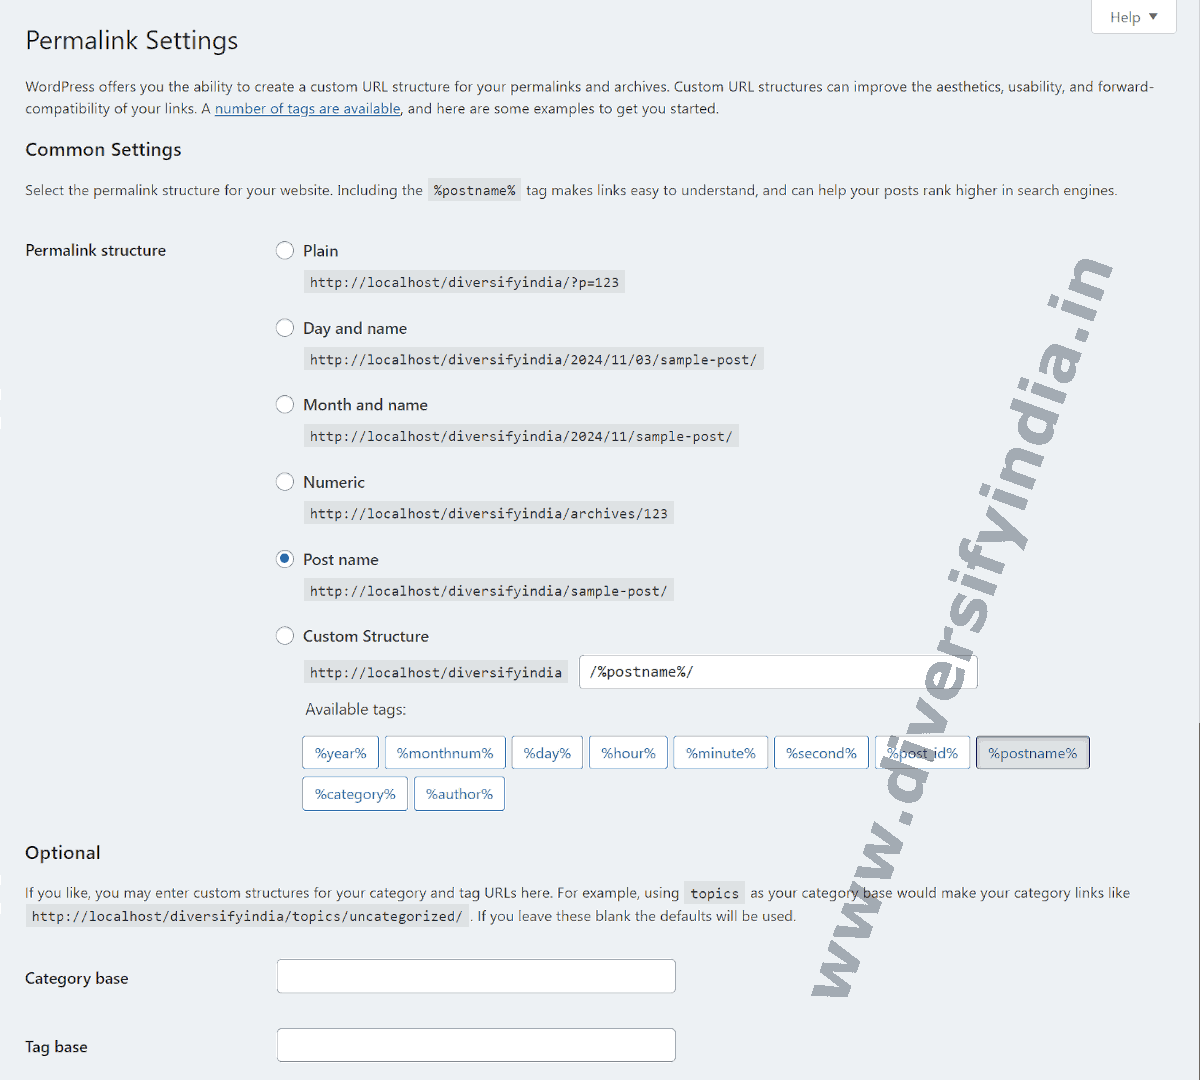
A permalink is a permanent link to a specific blog post or category. It is important to set the default permalink structure in WordPress for better user experience and SEO.
Recommended Setting
- Change the permalink structure to Post Name for a cleaner and more readable URL (e.g.,
yourwebsite.com/sample-post). The default structure is Day and Name (e.g.,yourwebsite.com/2024/11/04/sample-post).
Optional Settings
You can customize the structure of category and tag URLs:
- Category Base: Add a custom prefix for your category URLs (e.g.,
yourwebsite.com/my-category-base/your-category). - Tag Base: Add a custom prefix for your tag URLs (e.g.,
yourwebsite.com/my-tag-base/your-tag).
Note: If these fields are left empty, the default settings will be applied.
Privacy Settings
As a website owner, it is essential to comply with national and international privacy laws to protect user data and build trust. One important step is creating and displaying a Privacy Policy on your website.
In Privacy Settings, you have the option to select an existing Privacy Policy page or create a new one. This ensures that your website is transparent about data handling and complies with relevant regulations.